Email Node
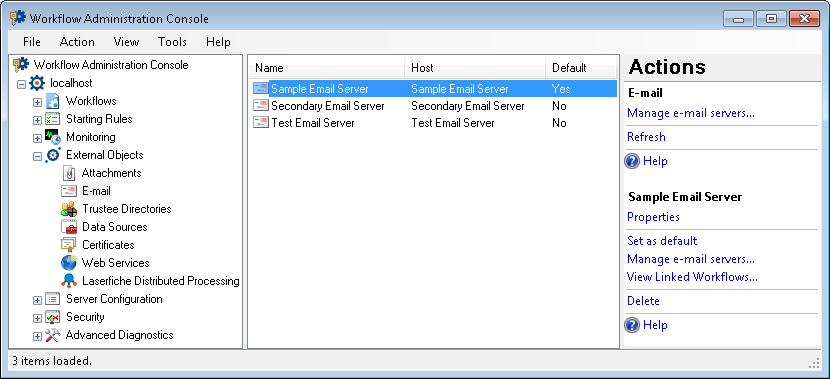
This node, under External Objects in the Workflow Administration Console, lets you view the e-mails servers that are configured to work with workflows on the Workflow Server. You can add, modify, and delete e-mail servers from this node.
To open this node
- In the Workflow Administration Console's Console Pane, expand the External Objects node.
- Select Email. The node will list of all the e-mail servers that are configured to work with workflows on the Workflow Server.
Tip: You can refresh this list to reflect recent changes by clicking the Refresh link below Email in the Actions Pane. Alternatively, right-click the Email node and select Refresh.
To add an e-mail server
- In the Console Pane, select the Email node.
- Click Manage e-mail servers from the Actions Pane. Alternatively, right-click the node or an existing e-mail server and select Manage e-mail servers.
- In the Email Server Manager dialog box, click Add.
- Configure the Email Server Properties.
To modify an e-mail server
- In the center Details Pane, select an e-mail server.
- Click Properties under the e-mail server's name in the Actions Pane, or right-click the e-mail server and select Properties.
- Configure the Email Server Properties.
Note: You can also modify an e-mail server by clicking Edit in the Email Server Manager dialog box. See the To add an e-mail server section above for instructions on how to access this dialog box.
To set an e-mail server as the default e-mail server
- In the center Details Pane, select an e-mail server.
- Click Set as default under the e-mail server's name in the Actions Pane, or right-click the e-mail server and select Set as default.
Note: You can also make an e-mail server the default e-mail server in the Email Server Manager dialog box. In this dialog box, double-click the Is Default column next to the e-mail server so that a green check mark  appears. The To add an e-mail server section above describes how to access the Email Server Manager.
To view the workflows that use a specific e-mail server
- In the center Details Pane, select an e-mail server.
- Click View Linked Workflows under the e-mail server's name in the Actions Pane, or right-click the e-mail server and select View Linked Workflows.
- The Linked Workflows dialog box will show the name, description, and version of the workflows that use the e-mail server.
To delete e-mail servers
- In the center Details Pane, select one or more e-mail servers. Hold down CTRL to select more than one e-mail server at once.
- Click Delete under the selected item's name in the Actions Pane, or right-click the e-mail server and select Delete.
Note: You can also delete one or more e-mail servers by clicking Delete in the Email Server Manager dialog box. See the To add an e-mail server section above for instructions on how to access this dialog box.
To export the contents of this node in a .csv, .xml, or .txt file
- Select the node in the Console Pane.
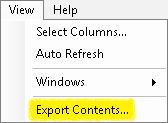
- Select View from the main menu.
- Click
 Export Contents.
 - In the Export data dialog box, name the exported file.
- Select CSV File, XML File, or Tab Delimited Text File from the drop-down menu.
- Click Save.

